Wednesday, May 16, 2012

Head board and foot board bench!

This is one of those great projects inspired by Pinterest! I saw a picture, read her tutorial and then tweeked it a little bit. So, I invite you to do the same! This project turned out so cute, and it cost me a total of about $12 bucks!

Start off by finding a headboard and foot board at a local Goodwill or other thrift store.
 I scored with this one at $4.99 for both pieces!!!!
 Next, measure the foot board to the very middle and make a mark- you will cut this in half on this line- so make it straight! (I want to add that once the foot board was cut in half, it was a deeper seat than I wanted, so I measured and cut the foot board on each side so I ended up with a 20 inch side and I made my seat 18 inches deep- I was much happier with this size- so make your foot board sides any size you like and then measure your seat accordingly).
 There it is- I cut it in half by myself- with one eye scrunched in terror the entire time! I would have closed them both- but that would have been more scary!!! I'm not a power tools kind of girl- so this was a challenge for me.
 Now, line up your foot board pieces to the large post on the sides of the headboard- mark a few spots to drill holes and insert 2 inch lengths of dowel rods. (you only need to buy one dowel rod and cut it into sections)- I used a total of five sections on each side. These are NOT for supporting weight- but just add a little more support to the structure of the bench.
 Once the sides are glued with the dowel rods inserted- let it dry for a few hours. (disregard the boards that look like a seat- we were experimenting in this picture)
 While the glue is drying for your sides- go ahead and build your seat. We chose to make a box structure and put short slats. Measure the width of the bench and the depth- size your seat accordingly.
 We (my hubby was great help at this point!)- screwed the outer box together with wood screws and then placed our slats on top using wood screws, then flipped it over and used small L brackets under each slat.
 With the bench still laying on it's back we put the seat in place and used large L brackets to secure it.
 See the large L bracket?.... we also used wood screws to add extra support.
 Ta-da!!! Isn't it pretty!!!! So, we sanded it a little and then coated it with a primer/paint combo. If you only want to paint the bench a solid color with no distressing- skip down a few pictures- and don't grab the Vaseline!
 Then I grabbed some Vaseline because I wanted it to look chippy painted and funky- and this my friends is the BEST trick ever to get that look!
 Just smear a little Vaseline in the spots that you want to remain the color of the base coat- in this case white. - Now I should caution you that this really works- so if you want small little streaks it would be better to apply the Vaseline with a paint brush so you can get it exactly where you want it.
 I wanted it to be big chunks and streaks so I just used my finger to smear it on. Can you see the Vaseline one the edges?... the picture is tricky- but it's there.
 Now, paint the bench whatever color you like- I chose bright pink! Isn't it so happy!!!!
 Let your top coat of paint sit for at least 20 minutes to make sure it is dry. Then grab a dry rag and just start rubbing the bench everywhere you put the Vaseline. That top color will wipe right off and the underneath color will pop out. See!
 Again- if you want smaller spots or more like lines- use a brush. See how large my white spots are- that's what it will look like if you smear it on with your finger.
 Oh so fun!!! I LOVE this so much!
 There you have it- my distressed bench. I wasn't sure where I was going to put the bench, so I went ahead and used a clear coat sealer over the top just in case it's new home is outside.
 One more pic of the white popping out of the pink..... did I mention I love it??? Well, I do!
 Here it is, sitting in our entry with a few little pillows- I plan to make a seat cushion for it with oilcloth, and I've decided it will live on the back deck for the summer!

Tuesday, May 15, 2012

Exercise trick...

For all the mamas out there who are at a loss as to what to do with those left over baby legs.... well here is a good solution! I've been exercising a lot lately, and praise the LORD my running shorts and pants are getting too big! So, while I was thrilled about that, it presented a new problem- my waist band would no longer hold my phone in place!... yeah, I don't have a clip, I know! So, I grabbed one of my little bug's baby legs, folded it in half to form a pocket and slipped it on my arm- problem solved! The elastic holds it on and it works great! There you go!!!!


Thursday, May 10, 2012

Ice cream sundae cake!

My biggest little said "I want a cake that looks like an ice cream sundae for my birthday, ok Mom?".... uh, sure.... I can do that!
So, I did. I think it turned out ok. It's a little messy, but hey, so are sundaes! So let me tell you what I did.

Two cake mixes-
one cupcake pan (I only baked 9 cupcakes not 12)
one bunt cake pan
one  small circle pan (about 4 inches around) (make two of these total)
One large batch of home made marshmallow fondant
Sprinkles
One large batch of home made butter cream icing
icing bag (or ziploc bags)- icing tips
one cherry
tooth picks/ wooden skewer sticks

Bake all the cakes and let cool completely.
Begin by stacking the two small circular cakes on top of each other - you will want to ice in between them with your choice of flavor. Once stacked, ice the entire outside of these cakes and cover with fondant. This will be your base. Position four wooden skewers about 1/3 of the way in around the center- this will support the bunt cake later.  


Turn bunt cake right side up and ice completely. Cover with fondant completely. Now turn it upside down and stack on the base- if you feel like it isn't sturdy enough, you can cut a heavy duty paper plate to size and use as support underneath the bunt cake- if you do this, you will want to cover the plate in fondant as well- just for looks.

Ice cupcakes in different colors of butter cream and stack them on top of the bunt cake. I actually iced my cupcakes upside down because they looked more like ice cream scoops that way. Use tooth picks or wooden skewers to position them on the cake.

Once all of the cupcakes are in place- decorate! I decorated with chocolate, vanilla and strawberry icing- added sprinkles, a whirl of white icing on top for whipped cream and then a real cherry to top it off.
I rolled out extra fondant to make a trim around the bottom of the bowl, and around the top edge of the bowl (the top edge I did before I place the cupcakes on)- get creative and make it however you like!


I will post my home made fondant recipe asap!

Wednesday, May 2, 2012

Puppy love!

Meet Houston and Stella... our four legged babies. They are spoiled rotten and loved so much! They are both two. Houston is a "bugg"- Boston Terrier/Pug mix and Stella is a Boxer. They pretty much rule the house, sleep on our stuff and entertain us.... pretty sure Cesar would die if he came over to see how we do things with dogs around here!


Stella was napping and one of my littles thought she needed a few blankies- she didn't seem to mind.

Smack dab in the big middle of redecorating and making crafts, I found the dogs in the "new to me" vintage chairs I am planning to recover... good thing I am planning to recover them! Rotten dogs!

Notice the "how can I help you?" look on Stella's face... yeah, she wasn't about to get out of that chair! It cracks me up that she's all wadded up in there with her head gently resting on the pillow. Silly dog!

Well, now you know Houston and Stella... and you have seen how they spend their days... until Mama gets the leash and then they go ape crazy!

Tuesday, May 1, 2012

Lamp shade make over!

I bought this little lamp the other day, and decided to add a few little cute tid bits to make it even sweeter!
Here's what you need- fabric (several different patterns)
                           heat bond
                  iron
                       buttons
                                                          stencil, or hand drawn design
                               hot glue gun
                                         permanent marker.

Sorry that I don't have pictures of the first few steps- being the genius I am, I took pictures not realizing I had no memory card in the camera... so no pictures.
Anyway- the steps are simple. Just cut squares of your fabric and iron the fabric  on to the heat bond. (heat bond is the stuff that will melt when ironed, and then you peel the backer paper off and re-iron to whatever surface you want your fabric to stick to.... does that make sense?)
When all of your fabric is ironed on it should look similar to a patch work quilt.
Next, grab your design and trace it on to the paper side of the heat bond. Once you have the design on the heat bond, cut it out, peel the paper backing away and place it on the lamp shade or pillow- whatever you are decorating.
Since I wanted to re-do this lamp shade I just took it off the base and slipped it on to the ironing board to iron the fabric birds on.


I placed the birds where I wanted them and ironed them on. (there are directions on the heat bond to follow as well)
 These are the tiny black buttons I used for eyes.
 Oh, notice that the fabric of the wing is different than the body- I ironed the wings to the body before I ironed the body to the lamp shade. Then I hot glued the eye on.


The next thing was to make little feet and beaks- I used a sharpie black marker and it did bleed a little bit- probably a fine tip one would have been better.
 More little finished birdies.
 So sweet! I made each side of the lamp shade a little different.

 The last thing I did was add a felt flower to the front of the shade- I thought it looked really sweet.
 So there you have it- simple, easy but really cute.... in my opinion of course!

Saturday, April 28, 2012

Little details

I'm one of those semi-detail oriented people.... I say semi because it really depends on what it is that I care about. So, when it comes to measuring before I hang a shelf.... yeah, I just eyeball it and call it good. Do I have a million holes in my walls, yeah I do! Now, when it comes to little cute details like ric rac on pillows, pleats on baby dresses, buttons on baby shoes, ribbon on wall hangings, birds on lamp shades, yoyo's on pillows.... well you get the idea, I am super detailed! I LOVE little details that make something special. So with that in mind, here's a quick little project that has a cute little detail.


I started with a 2 dollar shelf from Goodwill- it was raw wood. I primed it white- see it there laying long and diagonal?- yeah, that's the one.

Then I painted it this froggy green color and sprayed it with a clear coat.

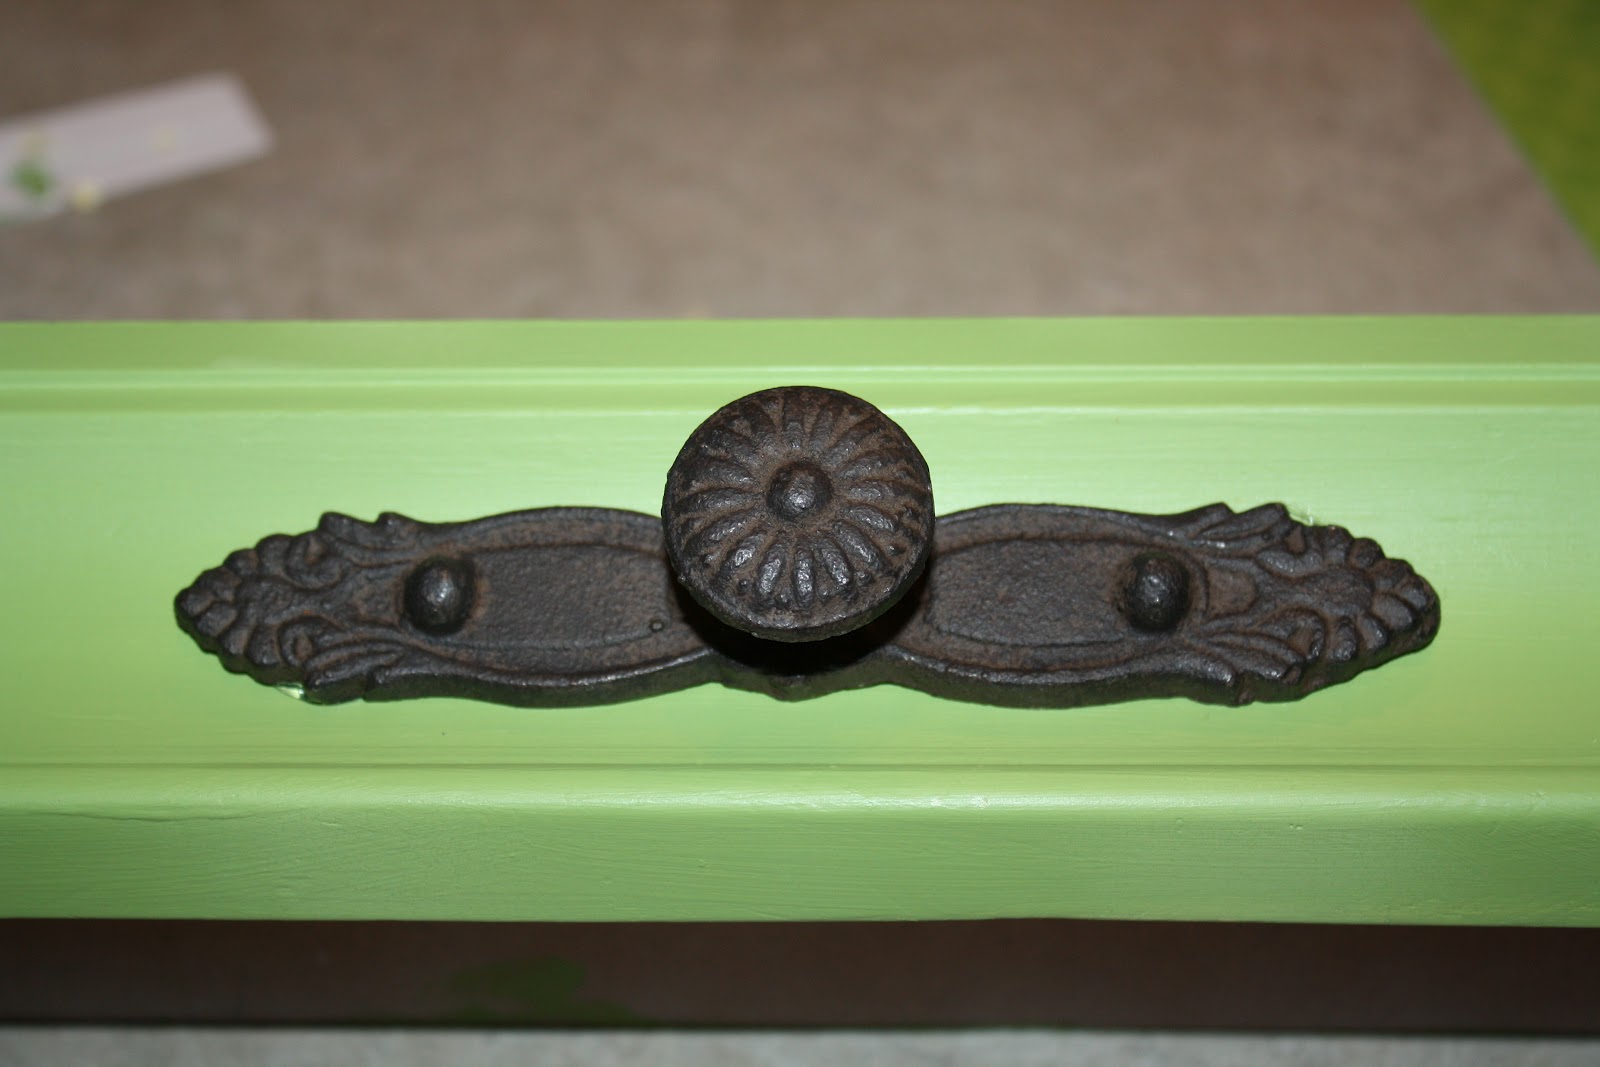
I had picked up these little drawer pulls at the craft store because I like shabby chic, vintage looking stuff- and these look old to me. So, I whipped out my trusty hot glue gun, took the screws out of the drawer pull and went to work! (suddenly I'm hearing Bob the Builder say "can we do it?" and I want to shout "YES WE CAN!!!"... clearly I have a toddler!)

Another shot of my supplies- :) Now all you have to do is put gobs and gobs of hot glue on the back of the drawer knob and stick it where ever you think looks good on the shelf...

Smack dab in the middle is where I wanted it- so there it is!

I hung it on the wall, threw a couple little things on it and - there you have it- a little shelf with a sweet little detail!
 
This is a little up close- see that adorable little frog on the block? He looked a little plain, so I decided to add a little detail to him too.

Grabbed some scrapbook paper, scissors and double sided tape- whipped out an initial and stuck 'er on! It's like kindergarten art time all over again- LOVE it!!!
So there you go- little details that can add charm, fun or fancy to plain objects.

Friday, April 27, 2012

Fabulously Fun Fabric For .... Pillows!

Yeah, so pillows doesn't start with an "F" so it kinda messed up my title.... oh well.... bygones!
So, here is a sampling of some of the fun slipcovers I've been making for my living room.

These are fun little birds I made using heat bond, fabric and some zigzag stitching on the sewing machine. The long striped pillow is from a jelly roll I bought and put together- I used the entire jelly roll until I had one large piece of fabric and then I just cut that to size for each project.


This is the pillow I made using the home made fabric yoyo's.... it's probably my least favorite because I regret my choice of fabric for that center yoyo.... oh well....


I pretty much LOVE this one! It's a felt fabric flower that I sewed instead of glued- and I adore it! The actual cover is made from a piece of shower fabric that we got on clearance at Target- the shower curtain was over two yards big and it was only 4 bucks!- pretty sure there will be more yellow in my future!


This funky little pillow was an attempt at using up some scraps- so I sewed the three prints together, added a flap of green that I appliqued the same little birds too and wala! A patchy, funky pillow.


These are some of the pillows on the couch- the second one from the left is another section of the same jelly roll, and some canvas and little fabric yoyo's.

So, as you can see, there are endless possibilities when it comes to making slip covers for pillows!